When I was an art teacher in public school for many years, one of the activities my students liked best was how to make a Halloween bat. It is such an easy project. It does not require many supplies and can be made quickly with in 30 minutes. If working with a group, you can pre-make the patterns for the children to share. As an introduction, I would talk about bats first and share some facts about REAL bats since most children only think of them as Halloween bats. The children were always amazed to know that bats can be helpful to the environment by eating mosquitoes and other insects.
The supplies you will need:
- scissors
- black construction paper
- white crayon or pencil
- bat pattern
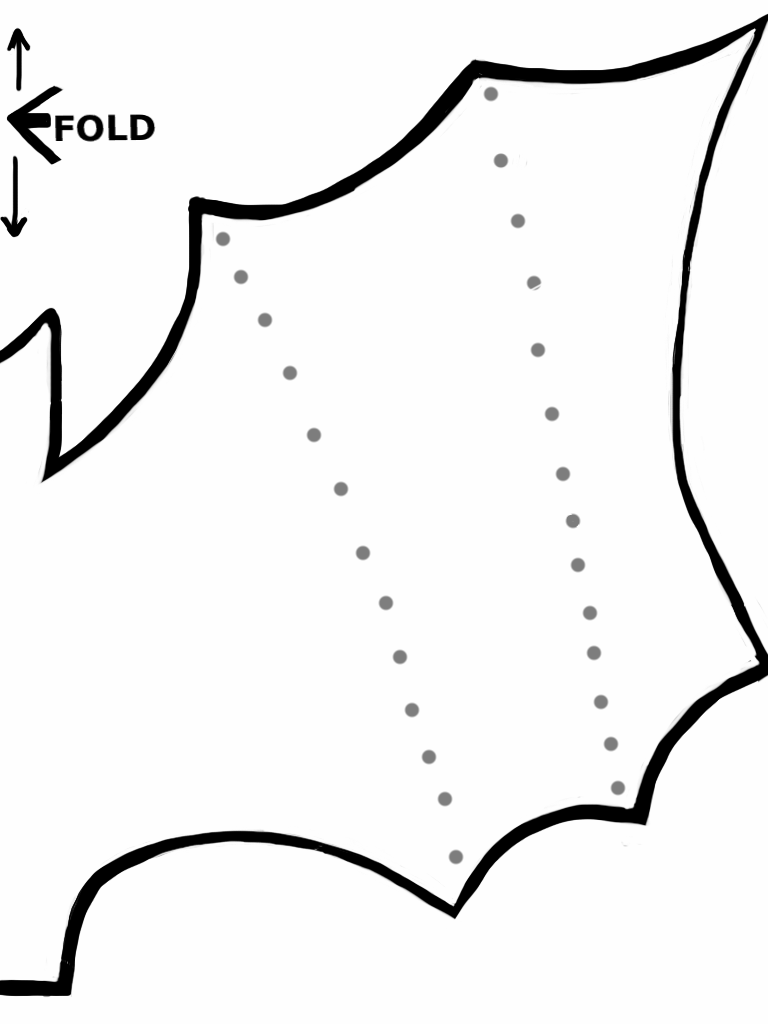
BatPattern2
Click here to download and print the pattern: BatPattern2 (1)
- Fold the paper in half-length wise
- Cut out the Halloween Bats pattern above and place the head and tail, left side of pattern against the fold. Cut on the white line being careful to not cut on the folded edge. Do not cut on the broken lines. Instruct the children to place their other hand on the fold and not to cut where their hand is.
- Decorate the Halloween bats with crayons if desired.
- Fold on broken lines. The bat’s wings will flap when moved through the air by holding with two fingers from the tail portion. (see the video for a demonstration) Strings can be added if desired by punching a small hole with a hole punch and tying with a string. It is a really great bulletin board display or around a door way. If hung from the ceiling the Halloween bats will “fly” with the air current. If you do this though be sure and let the kids make an extra one to play with and take home.

Latest posts by Jan Watford (see all)
- Your First Time Hanging Out with Squirrly - April 23, 2019
- Jan C Watford Illustrations for 2017 - February 15, 2018
- My Illustrations Last Quarter of 2016 - February 15, 2017